Breakfast Nook Before & After

Last spring I started helping a good friend of mine decorate her breakfast nook. She, and her family moved into the house just before last Christmas. The space is significantly larger than the last space, so we needed to try to incorporate good pieces with some pieces that we could rescue to help save on the cost.

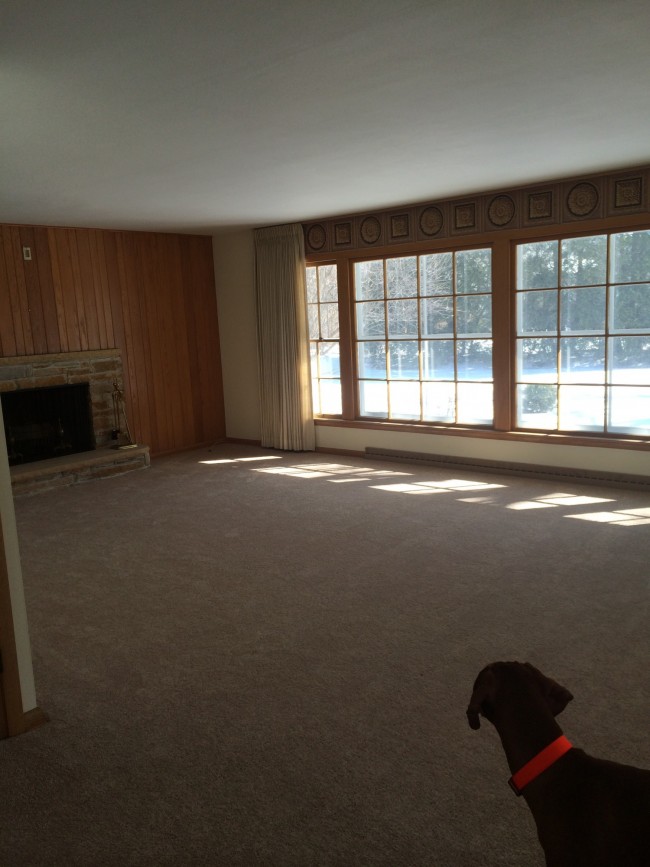
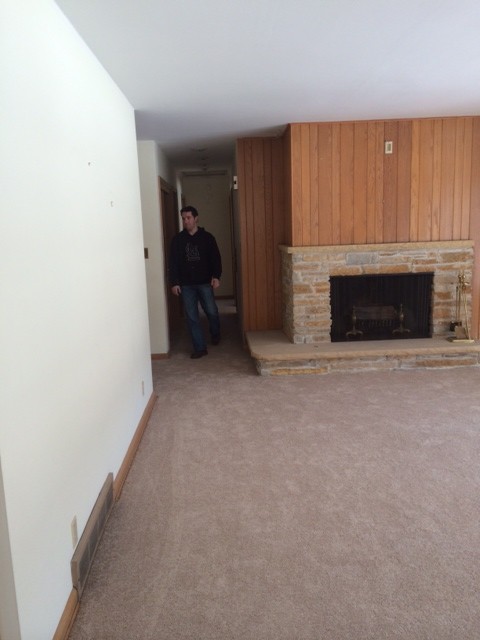
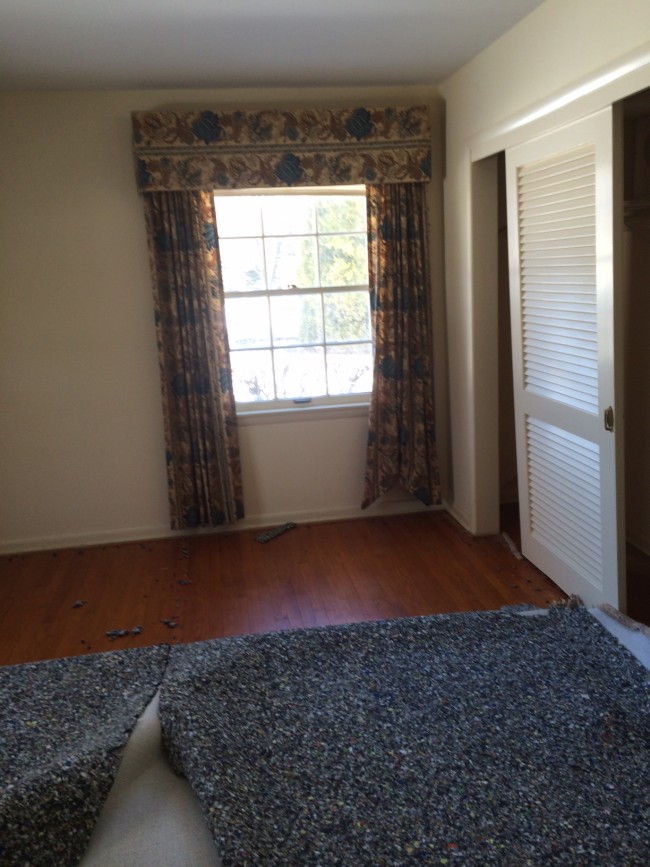
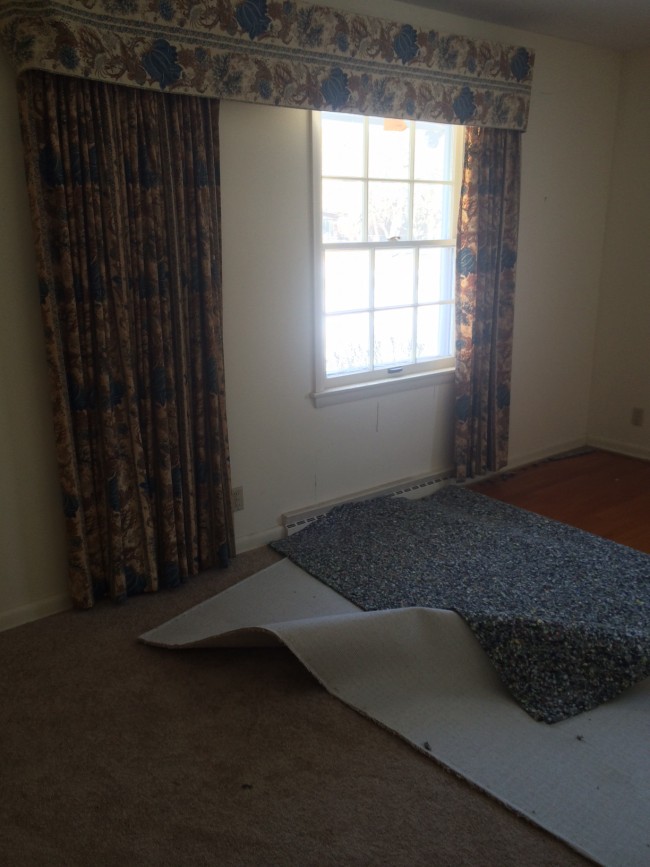
and a quick before….

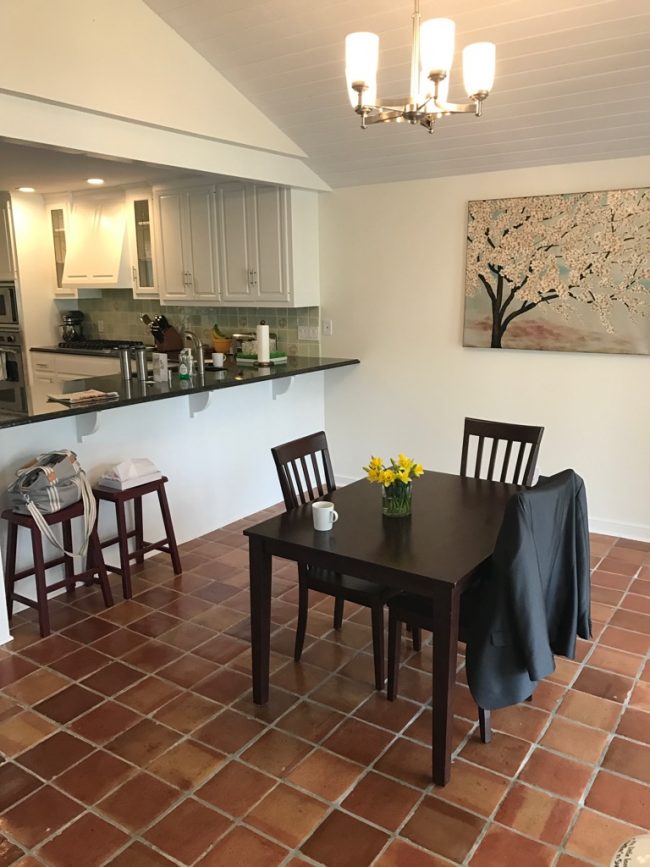
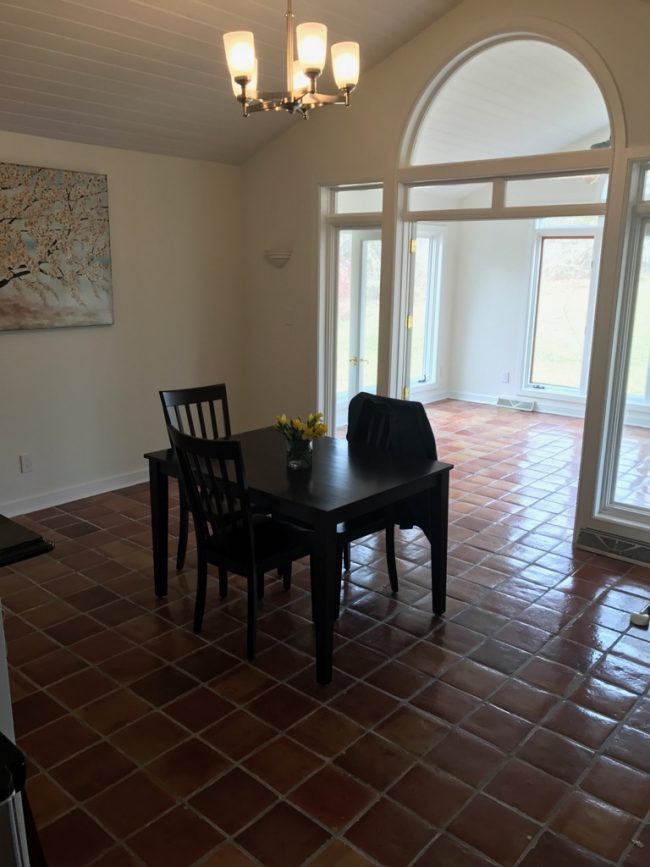
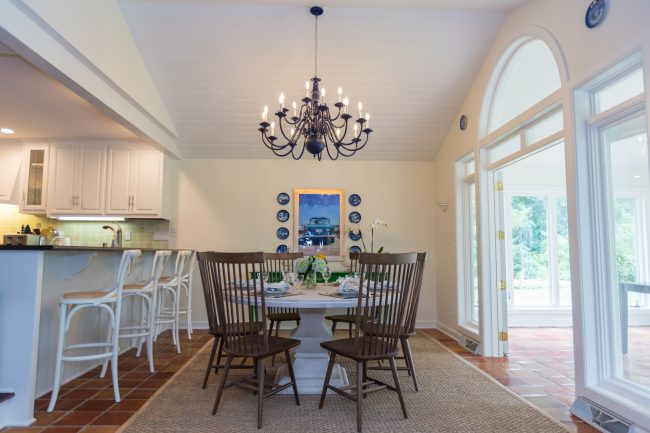
as you can see the space was pretty empty, table was too small, bar stools too short, and a big blank wall that needed some love….

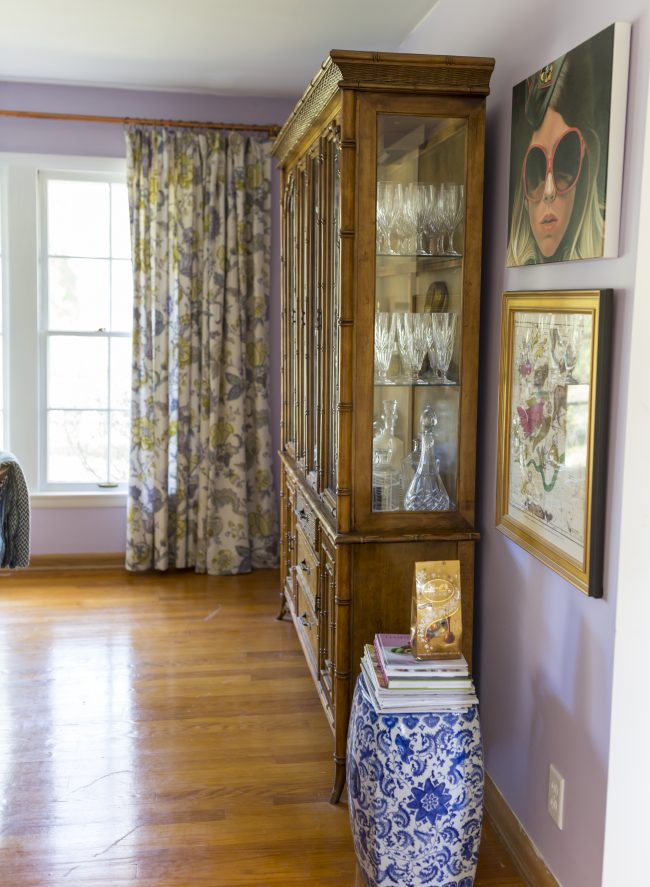
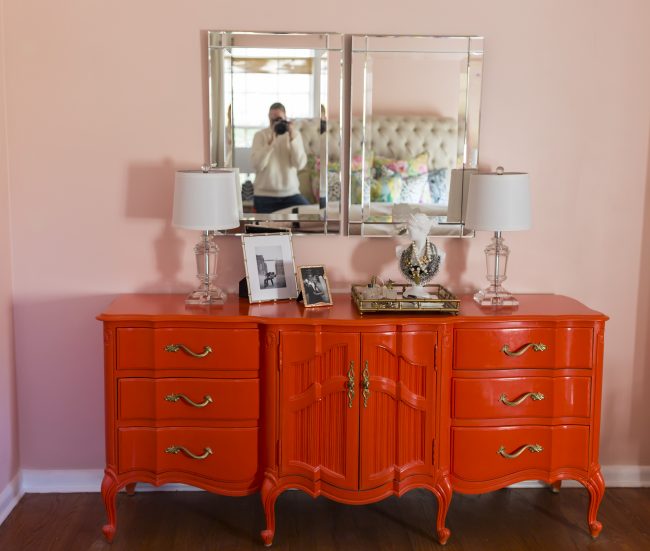
For this space one of the unique furniture rescues we did was this console table. I found it at a local consignment shop, and I refinished it in a beautiful high gloss laquer using Fine Paints of Eurpoe Paint. Have you ever used this paint. It is super tricky to paint with, but its super high quality and if you get it done right the after is beautiful.

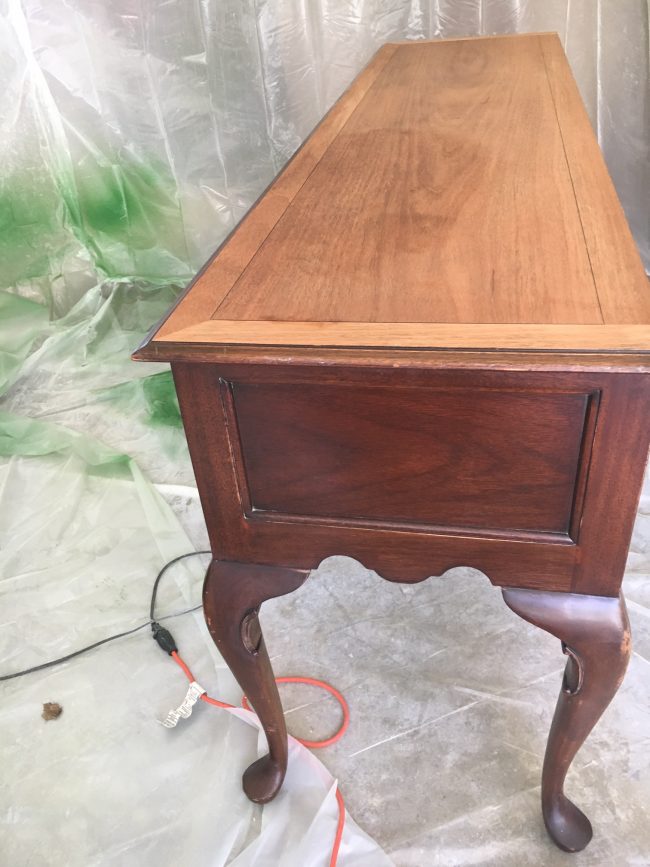
I am the worst at taking before pictures, but here is the before of the console. Special shout out to my Uncle Bill for his help in fixing one of the feet on this piece. When I brought it home I realized one of the feet was busted off, and he kindly help me fix it. It’s a good reminder for those hunting for great pieces out there. Slow down, take your time, and make sure you know what you are getting. This worked out, but if I didn’t have someone to help, it would not have turned out nearly as good!

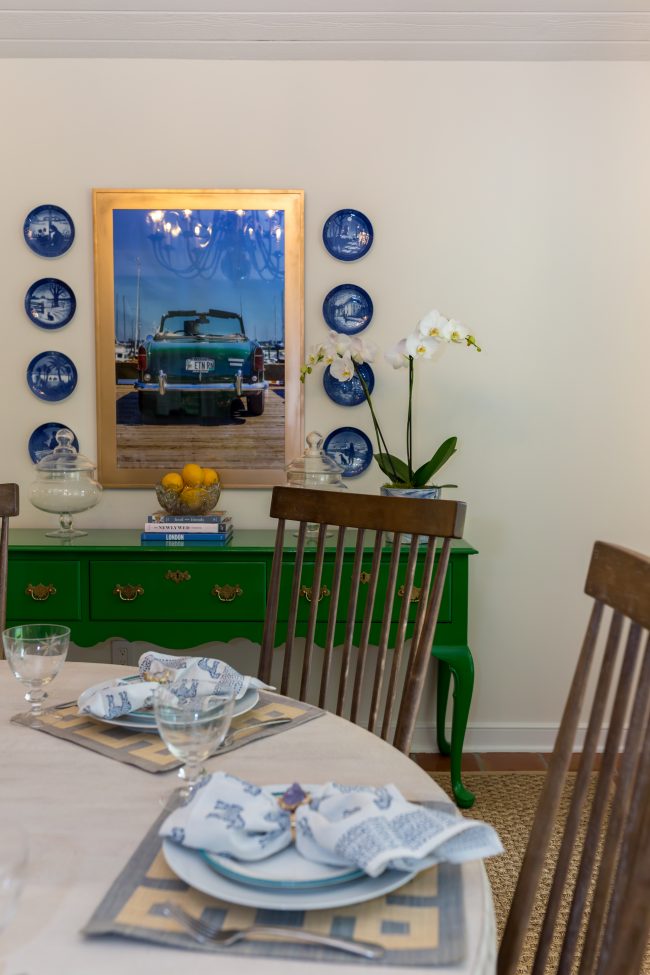
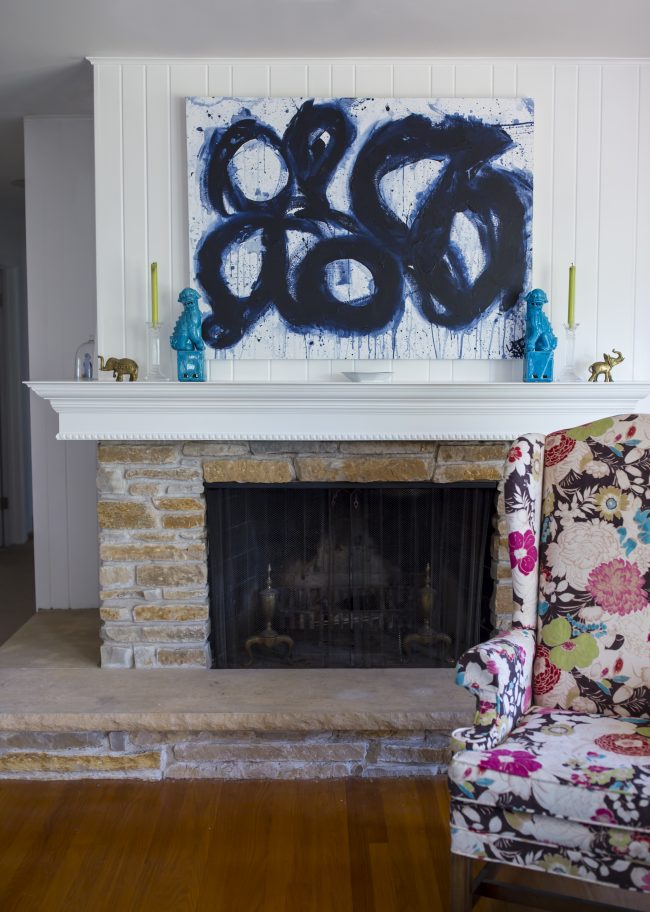
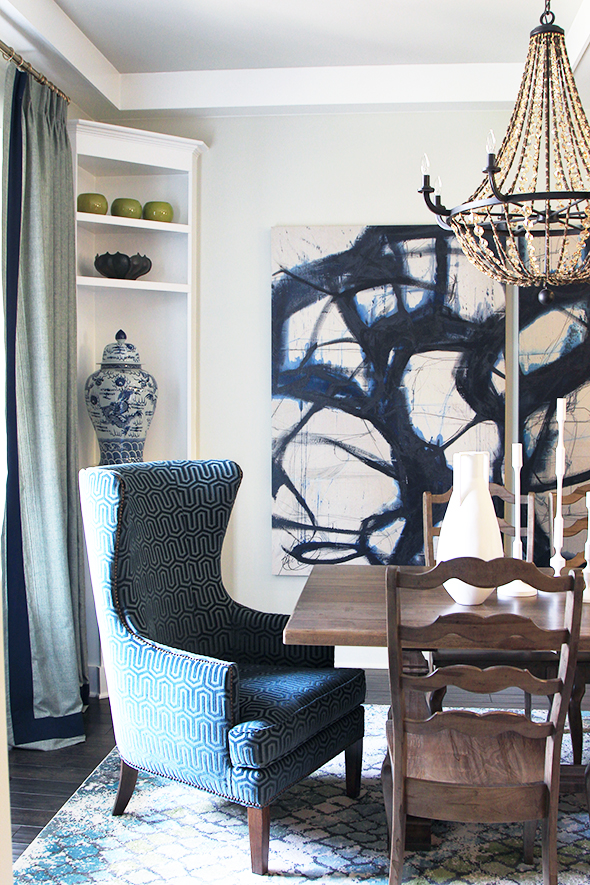
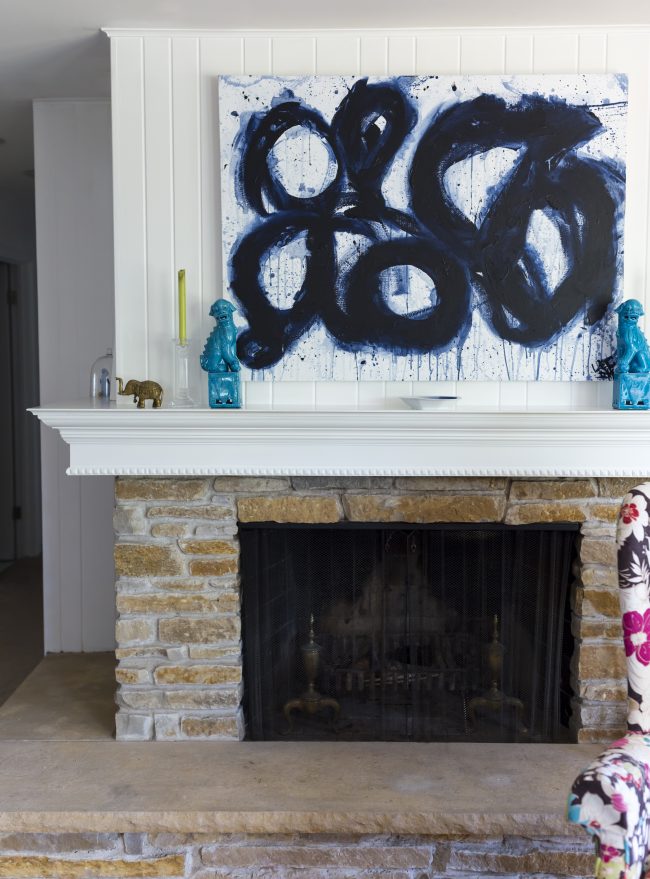
I also love love the art that we filled the wall with. To start we featured a vintage car picture that my brother and law and I took together on vacation last summer. The vintage car sitting on a dock on the coast of Maine was  a perfect piece for this family, and the color worked so well in the space. We mixed this with Vintage Royal Coppenhagen Christmas Plates. My mother has featured these plates in her homes the entire time I have been growing up, and considering the navy and white trend that is currently going on I am surprised I haven’t seen anyone else take on these accents. I love the way the vignette turned out!

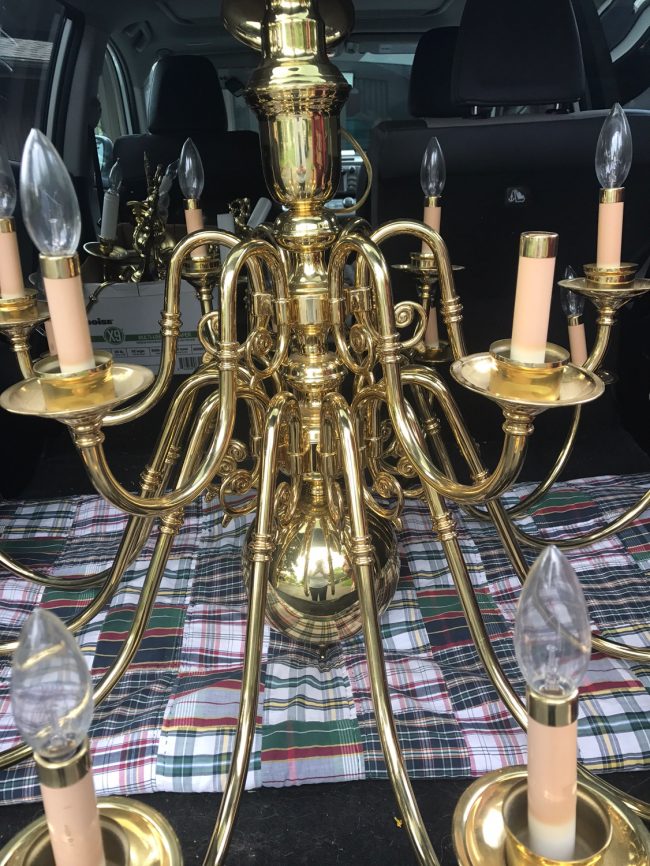
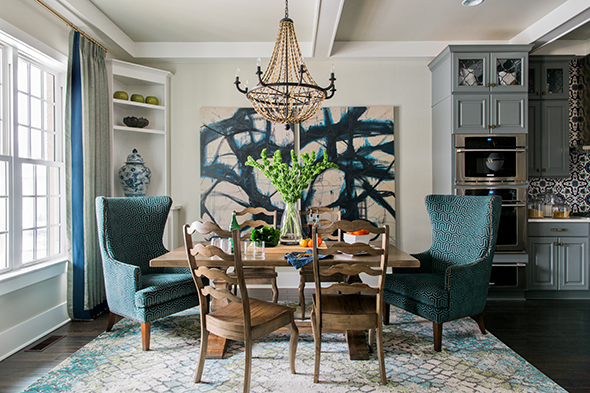
The other rescue that we did was this chandelier. If you remember we tackled an old brass chandelier like this one for my sunroom (check it out here). It turned out so well that I wanted to do it again here. The space is so big, and the previous chandelier was just teeny tiny. So I wanted something that filled the space but didn’t break the bank. We all know that chandliers this size can come with a mightly price tag, so this was a perfect solution.

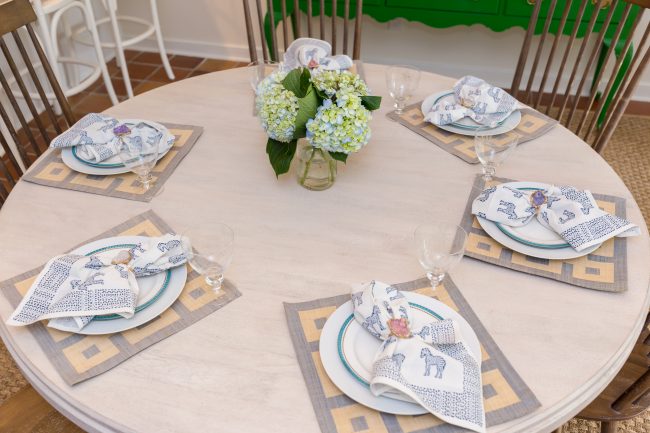
Like every good table we had to set it pretty for the pictures. Do you like this table setting? Check out the items for purchase in my coming pop up shop!

What do you think of the space? I personally love how well the big open area is filled out now. It’s the kind of space you just want to curl up in and have a cup of tea and a quiche.

Master Bathroom Reveal

this post has been a long time coming – so I am so sorry for my delay. If you remember I left off diving into my master bathroom during the one room challenge (spring) right after we moved in. We knew we were going to do the bathroom right away, but honestly I was too ambitious thinking it would take only 6 weeks. Lets be real. We do 90% of the work here at the #littleyellowhouserefresh ourself so no project ever only takes 6 weeks (i’m exaggerating some stuff we can get done in that time…). Anyway so needless to say the bathroom took us 6 months to get done, and at that point I wanted to wait until we officially wallpapered to showoff the final outcome. Well we wallpapered a while ago, so since I am a bad blogger I am just now posting, but we love our new space and I am excited to finally share it with you.

so our bathroom was a MESS, and it was started day 1. Literally Chris and my dad didn’t even try to unpack any boxes to make sure we could cook dinner or wear clothes, they instead thought it would be a fantastic idea to gut the bathroom. at least they got it started.

Like I said, we did all of the work ourself, with the assistance of my trusty dad (retired plumber, lucky us) and cousin (electrical). But Chris and I did all the tile work, mudding, wallpapering ect.

And here is the after. First of all – it was a jack n jill bathroom aka it was a walk through. 2 doors, one to the master bedroom and one to the front hallway. It made the bathroom really a lot smaller than it was, because most of the area was wasted with doors and walk way. This enabled us to make a vanity about 3x the original size. I mean the old teeny vanity didn’t allow me to even have a spot for a curling iron. WTF. So that was a HUGE win.

next HUGE win was opening up the wall that the shower had. Before the bathroom didn’t have a half wall. It went all the way up. It felt like a CAVE. I love the half wall. It’s a small bathroom but the opening up the wall helps it feel much bigger than it really is.

Next. Lets talk about this vanity. Are you in love or in LOVE. I am in DOUBLE LOVE. It’s so fun. It’s exactly what I wanted. It is a custom made piece by some amish friends of my dad. They are the BOMB.

The other thing I love that we changed totally was the doorway to the bathroom. The previous door swung into the bathroom – again waste of space. So we changed it out with 2 small double doors that swing into the bedroom. much better.

I topped the doors with small little circle trim. I thought that was an adorable little touch.

Overall I am super happy with it. I love the way the master bedroom transitions, and the whole space flows together. This, with the bedroom, was the first space that really started to feel like home here. I love it and it is a delight to get ready every morning.

Let me know what you think of the new space!

Since this bathroom, we have also finished our second bathroom so I hope to share that soon!

Sister’s Kitchen Renovation

Hey Friends!

This past weekend I was at my sisters house as she and her husband started renovating their kitchen! We had a great weekend and we lovingly named it #familydemo day. We had a whole crew there. Both sets of parents, sisters, brothers, and some friends. Since it’s a kitchen they were trying to do the renovation as fast as possible so they aren’t out of a kitchen too long.

This was the before of the Kitchen.

And here was the dinning room.

The kitchen was taking out all the cabinets and fully gutting down to fully replace everything. Also in the dinning room the goal was to remove the window and replace with all full sliding glass door to go outside to a new deck! Big project.

Here was my sister’s inspiration board.

We are a ridiculous family – so naturally we were all up by 5:30AM and we had the full kitchen demo’ed by 8:30AM!

And by the end of the day the window was prepped and put in.

Then the next day we got the rest of the cabinets in and my sister and I got the hardware on.

I love the hardware she picked out. It’s so fun!

Stay tuned over the next couple weeks, they still have a bit more to do. Flooring, Deck off the back of the house, backsplash, lighting updates, and of course of a bunch of detailing to do. I was pumped on how much we got done and the whole space is already looking fantastic!

Little Yellow House: DIY Curtains

When we first moved into the house the number one priority was curtains. But I could never find prints I really wanted myself so I knew from day 1 I would have to make them myself.

TNPLH: Curtain DIY

I follow the tutorial by Design Sponge. The one thing I would say is that the pleating tape was pretty difficult to work with. If I made pleated drapes again, I think I would just try to them from scratch – the old fashioned way. My mom tried to convince me to do the that way to begin with, but I didn’t listen 😉

See it here.

TNPLH: Little Yellow House Living Room Before 2

Just as a reminder – I have one very very large window in the living room (17 feet long!). and then I have one window that is connected in the dinning room. So I needed an economical solution for the 17ft window on the curtain rod. If I bought a curtain rod in the store it would be so expensive. So instead I bought a 20 foot copper pipe. Yep a 20ft pipe! Then I jazzed it up with fun Restoration Hardware ends. I like that it mixed copper and brass and it was economical!

TNPLH: Living Room Curtains

The curtains make the whole space so full and homey.

TNPLH: Curtain DIY

Curtain Estate Crystal Square Finials/Estate End Brackets/Estate Center Brackets

Mantel Art DIY

Excited to share the most recent update to our Mantel in the #littleyellowhouserefresh

TNPLH: DIY Mantel Art 2

Just as a reminder. This is what it looked like when we moved in.

Little Yellow House: Firehouse Before

And this was when it looked like when we first re-did the mantel.

Little Yellow House: DIY Mantle Reveal 1

See the DIY Mantel Post here, and here.

I liked the way we did the mantel at first. But there is just something about really big art that brings a level of sophistication to a room. So I got an itch to try and do a DIY piece of art. I first found the below inspiration and knew I wanted to try and re-create. It was from the HGTV Smart Home in North Carolina Last year. I love how sophisticated the large piece of art made the whole room feel.

art-inspiration

HGTV Smart Home 2016 in Raleigh, North Carolina

So, with the help of my husband we gave it a whirl.

TNPLH: Mantel Art DIY 1

Making the art was super fun. I pulled my husband in, he was a double major in multi-media and fine art in college. So he was a huge help in the process.

img_0336

img_0337

TNPLH: DIY Mantel Art 4

I love the crisp blue tones with the white and the pop of green. Can’t wait to decorate the mantel for Christmas!!!

Little Yellow House: Master Bedroom Reveal

We have been in the house for a year and a half now, and I have to say I am pretty happy with the progress that we have made so far.

TNPLH: Little Yellow House Master 1

This is what it looked like before….

Little Yellow House Master Bedroom Before 3

Little Yellow House Master Bedroom Before 2

Right away we ripped up the carpet and had the floors redone. Then it was the tedious process of re-painting all the trim.

TNPLH: Little Yellow House Refresh 3

We got the master bedroom done pretty early on, but I never took pictures. So finally I am excited to share!

TNPLH: Little Yellow House Master Reveal 4

I know many people may think that pink is way too girlie for a master bedroom. But it is such a warm color. When the sun is shinning in it just makes the whole space feel homey.

TNPLH: Furniture Rescue Master Bedroom Dresser 1

TNPLH: Little Yellow House Master 6

A lot of the furniture was brought from our condo, so we didn’t have to buy that many new things. My condo was feature on Apartment Therapy! Check out the post here!

The arm chair was a DIY upholstery job. Check out the full post here.

TNPLH: Little Yellow House Master Reveal 7

TNPLH: Little Yellow House Master Reveal 8

I made all the pillow myself. Ever in the market for some fun customer pillows? Give me a call!