
We are making progress on the living room and I am super pumped to share with you how we created this amazing mantel.
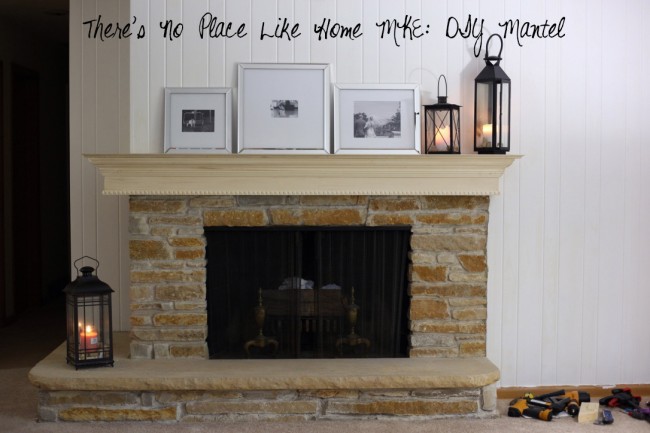
So I love that the new house has a fireplace, but it definitely needed some love when we first moved in.
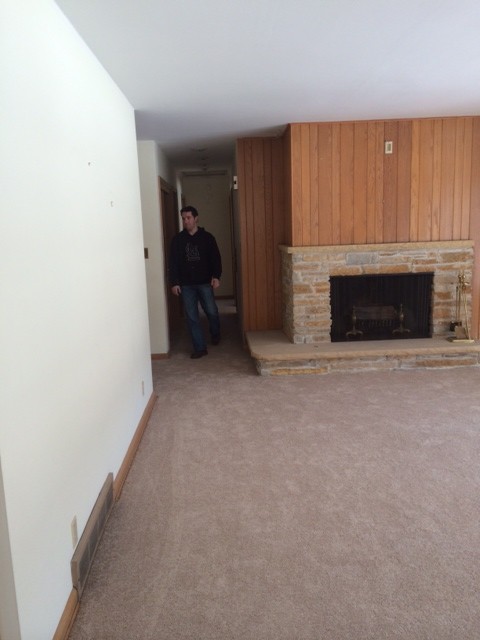
Wood paneling, no mantle, and I hate the stone. So I have been tackling this space for a bit with my husband. First I sanded down the paneling and primed it white. Then we started tackling the mantel. There was already this little stone piece at the top, but you couldn’t fit anything on it. So we just started adding layers to that piece.
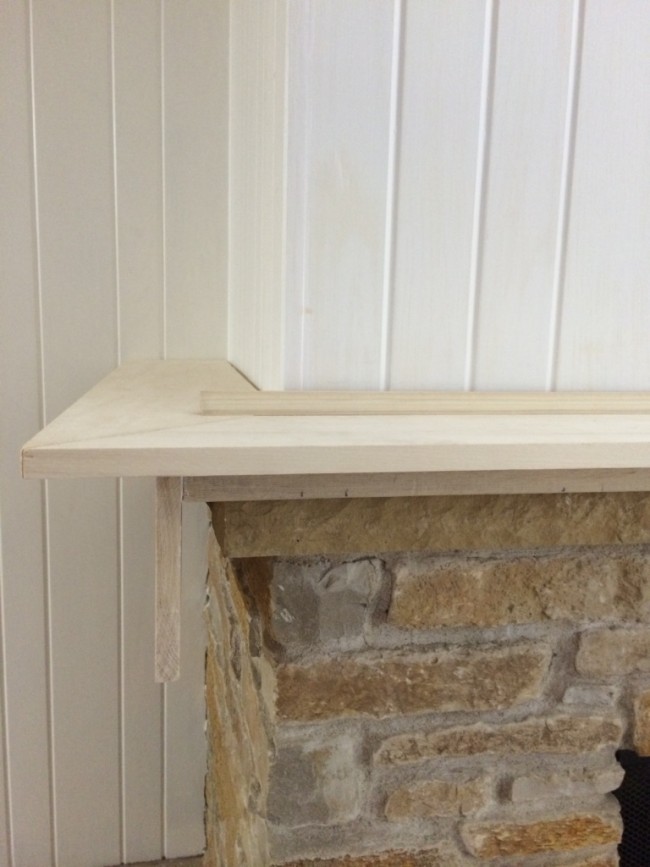
As you can see here we first added a 2×4 to the top of the stone with construction adhesive. Then we added the top and the skirt to the 2×4 to start and box out the mantle.
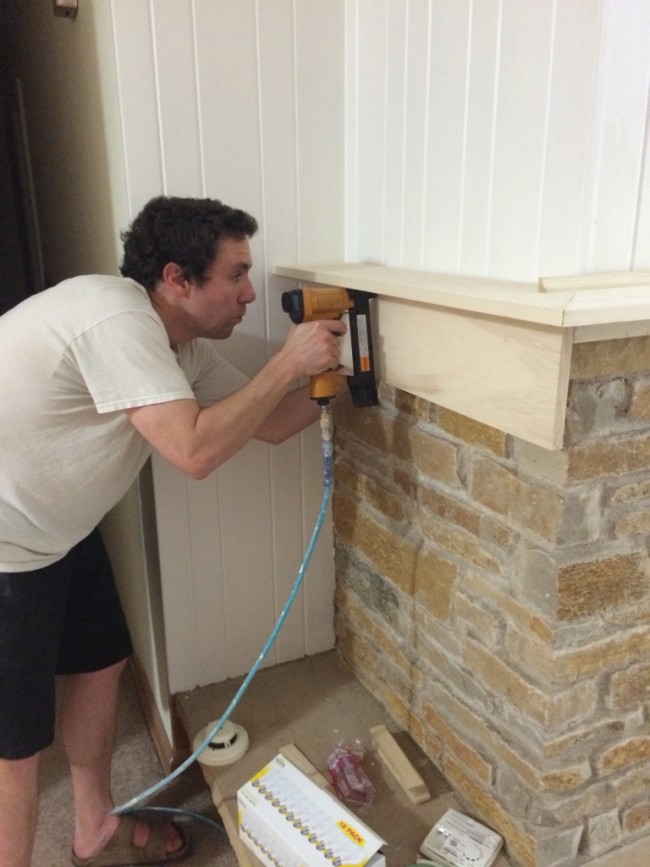
My husband used a combination of construction adhesive (glue) to first put in place and then would use a nail gun to secure it to the first 2×4 piece.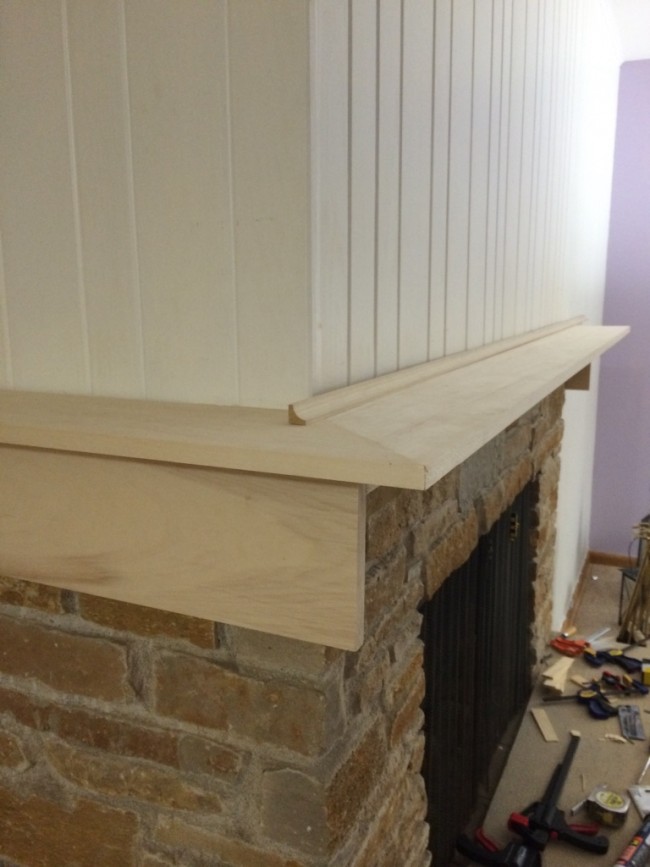

After we had the base of the mantel boxed out we were ready to start making it a bit more pretty with some crown molding.
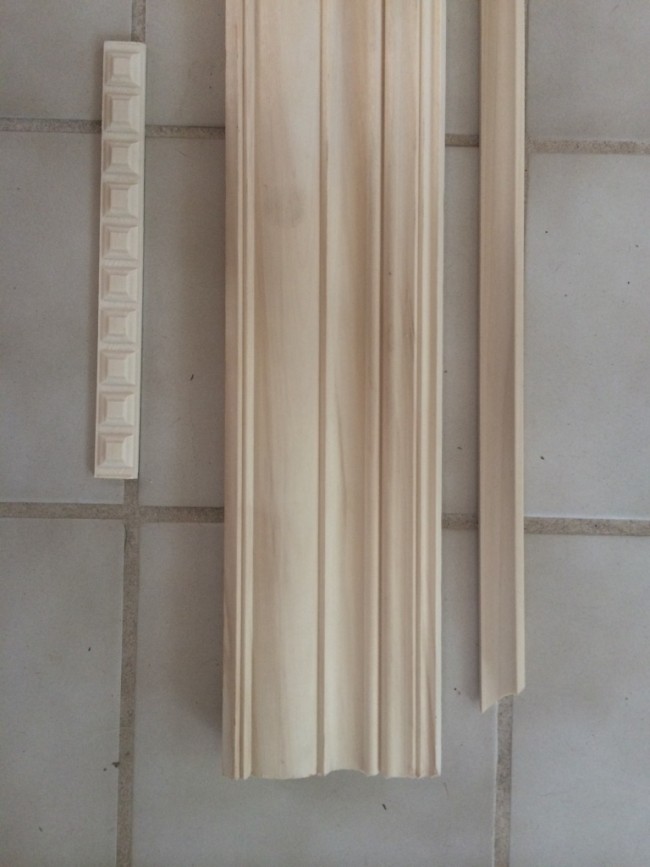
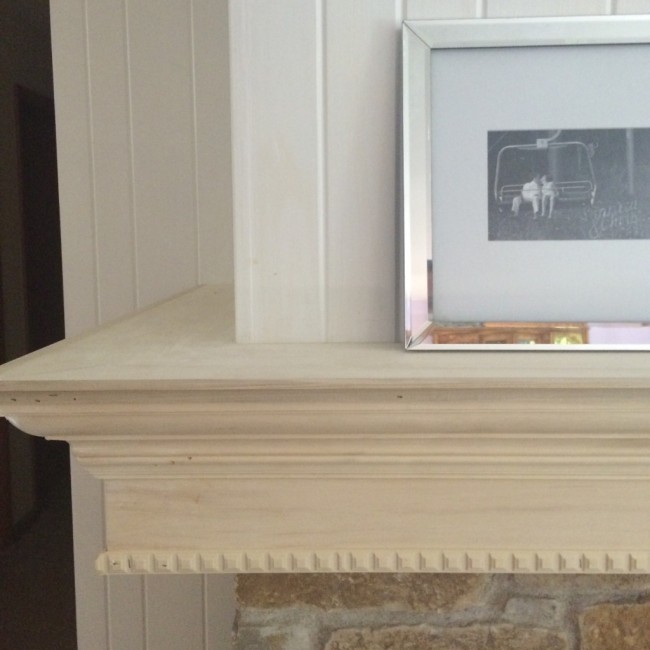
We used three different pieces of molding to finish off the mantel. A nice thick piece (4.5 inches wide), a small topper piece to place on top of that (attached to the edge of the topper), and a decorative square piece for the bottom of the skirt.
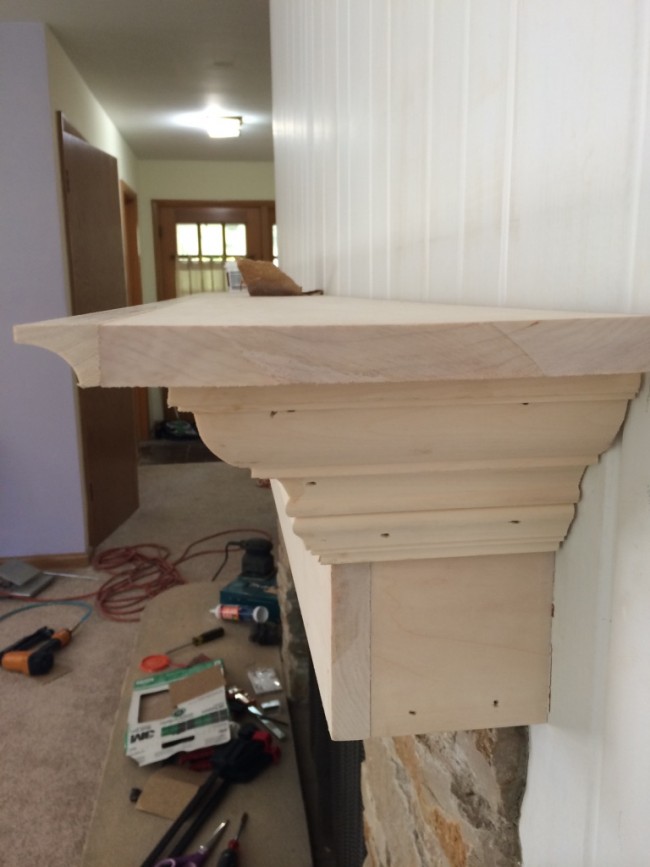
This side view you can see how we began layering on the decorative prices.
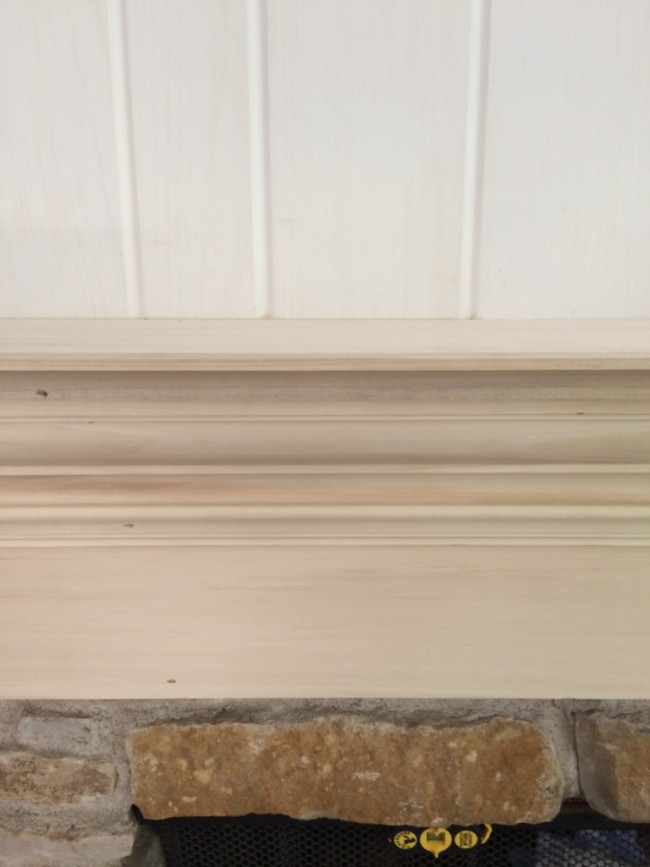
As you can see we still need to fill in all the nail holes and then paint, but it is certainly looking a lot better around here!

Stay tuned in the coming week to see how paint finishes it off!