Little Yellow House: Kitchen Plans

Hey All. Today, I am both excited and nervous. We are about to totally deconstruct our kitchen. We are almost at our 3 year mark on the house. We have done a lot, come a long way, but sometimes it feels like we still have a lot to do. A big project being the kitchen. And this weekend is go time.

We were lucky because although the kitchen isn’t glamorous it was nice that the appliances hung in there till the end (even with a leaky dishwasher it still worked!).

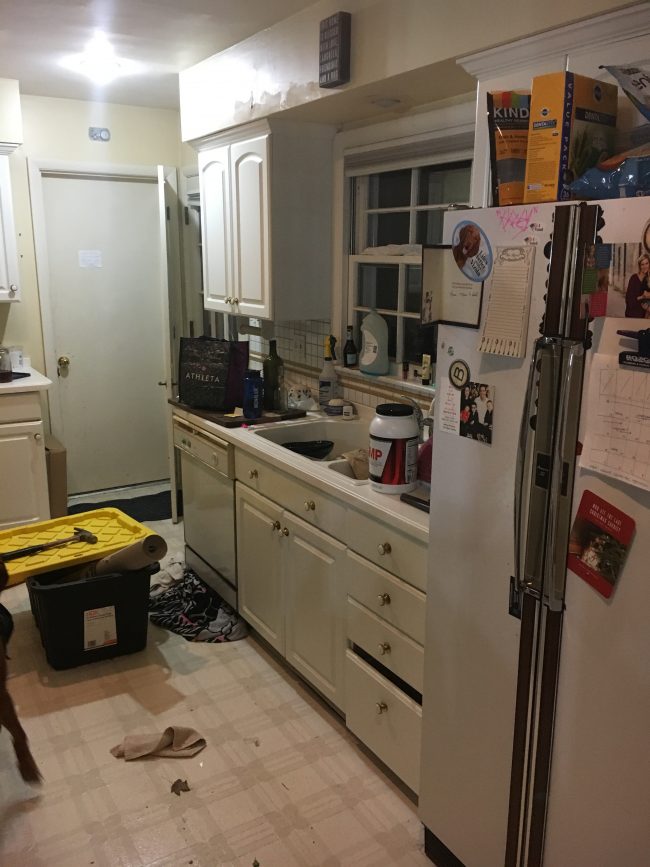
So, these before pics are pretty bad (I took them when we were half way through packing everything up)….but here we go.

See this below pic? The door right in the back there goes right out to the garage. Which is hard for organization. You will also notice that although it’s pretty big kitchen, there really is very little counter top space. It’s all these small fragmented spots. Difficult for cooking.

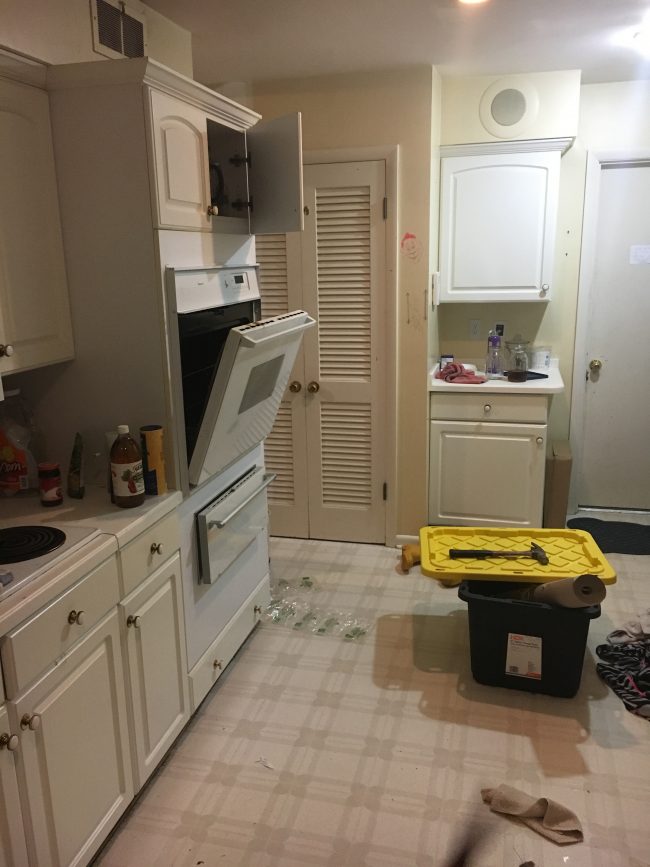
Here is a pic of the opposite end. Potentially there was a dinning nook here once?

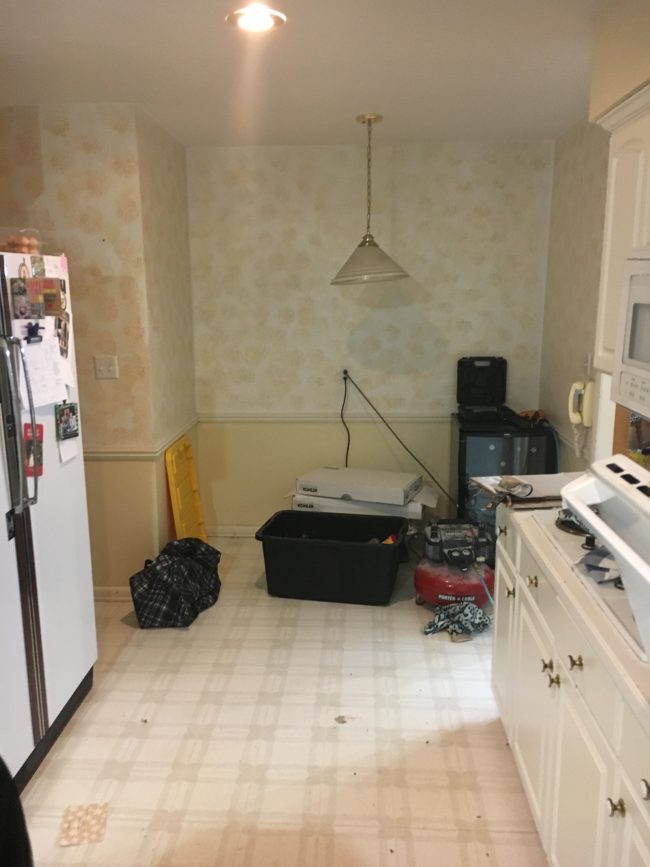
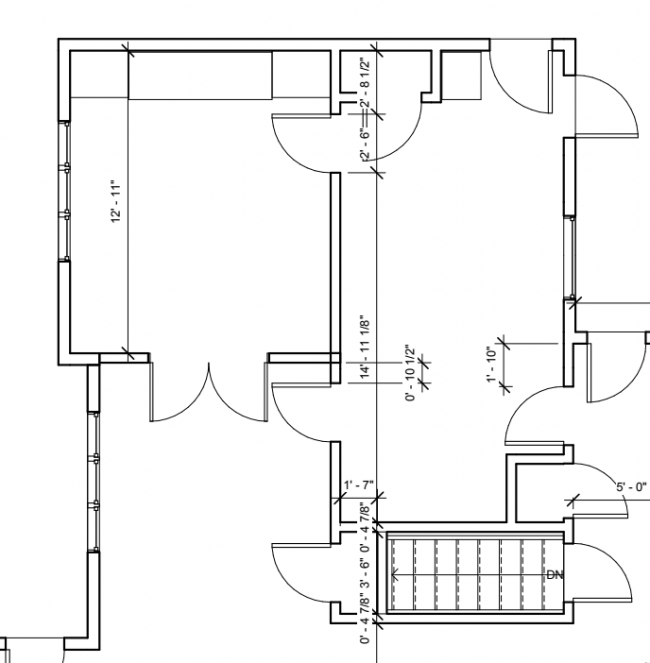
Here is the current layout. The space on the right side of this is where the kitchen is today. See the room on the left? That seriously was, what I think was a cocktail room. Full built ins, not big enough for a dinning room space.

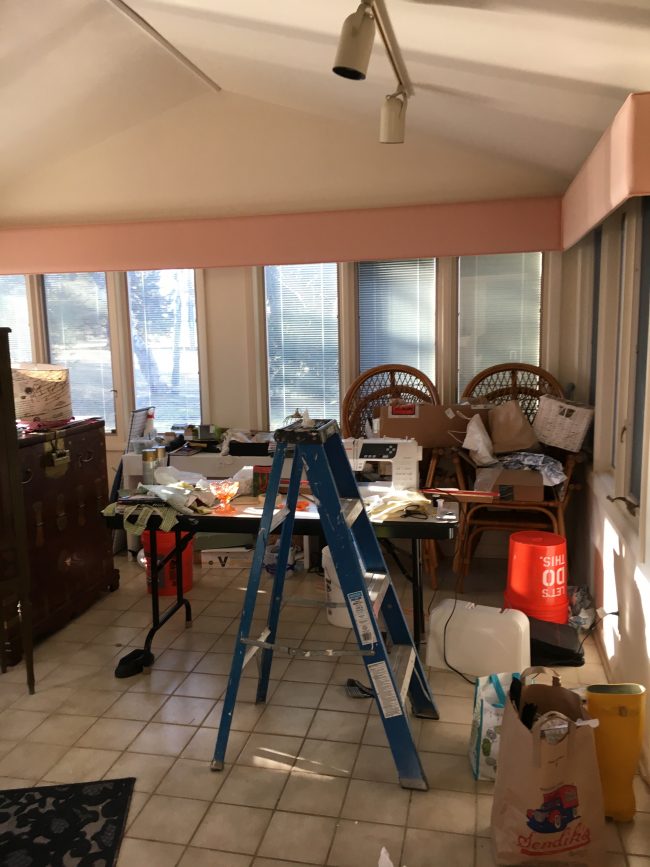
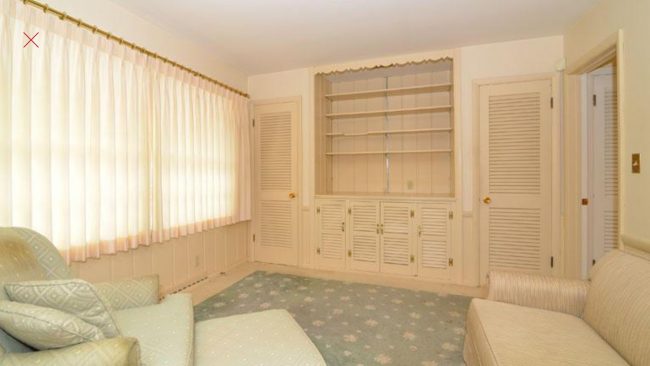
Here is a pic of the room mentioned above that was “on the left side” Again this room was right off the kitchen and a hard space to actually use.

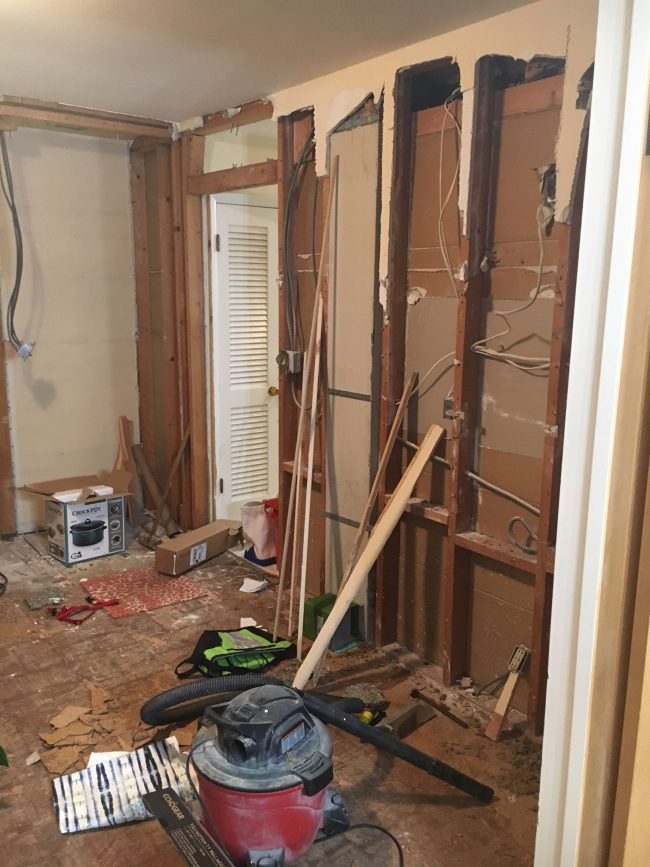
Here you can see we have already demo’ed this space. Since we weren’t using it for anything it was easier to start on at our leisure before we were really in high gear.

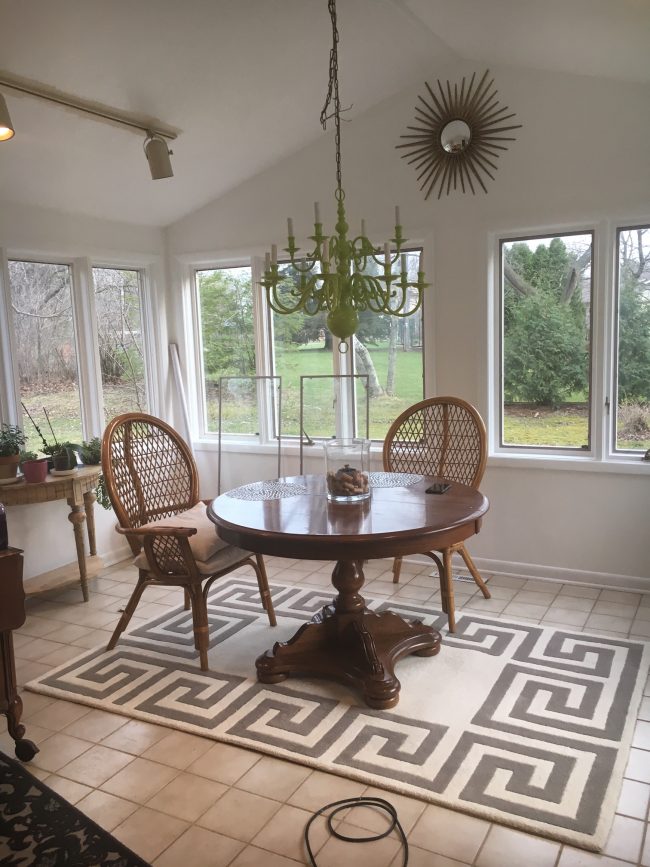
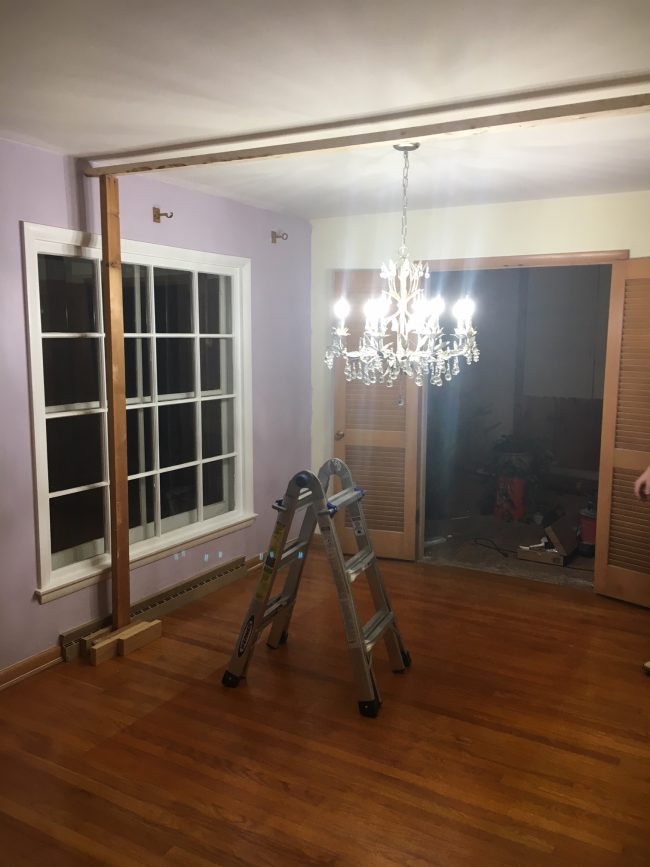
The “weird cocktail room” opens up to where our kitchen table is, through the double doors….

My sister is an architect so she created the perfect use of this space.

And now the today. Here is the plan!

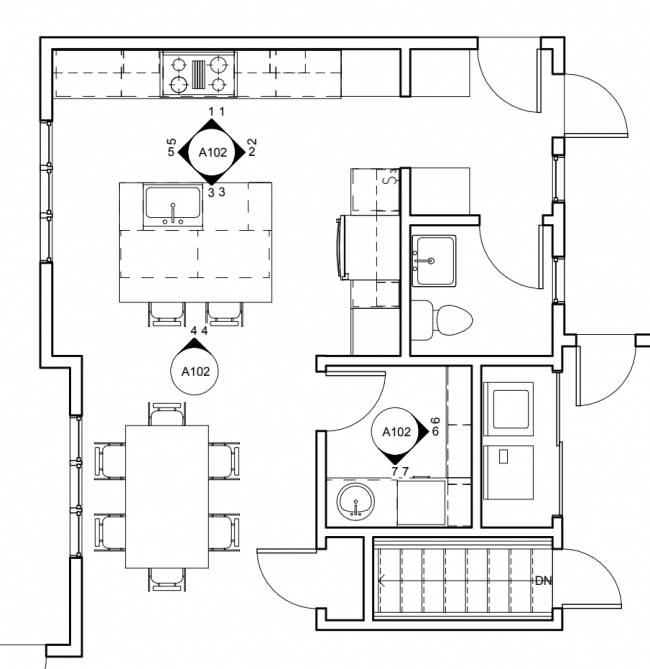
This new layout gains us a couple things.

1. It allows us to have a little mud room off the garage before entering the kitchen. Today the kitchen is always a mess because everything gets dumped right when we get home from work.

2. It opens up the kitchen to the dinning area and right into the rest of the living room.

3. It adds a half bath.

4. It also adds a…..butlers pantry! because we all know I have a dish problem!

5. And it adds laundry on floor vs. in the basement.

So pretty much my sister is the shit and utilized the space 100% better than it was being used before.

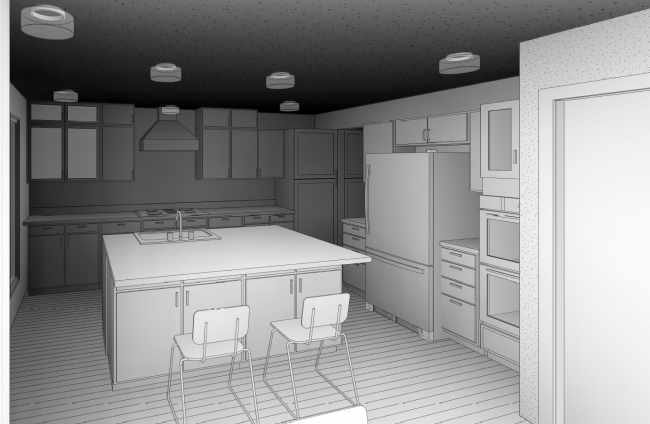
My sister was even able to do a cool 3D rendering.

Wish us luck and be sure to follow along on instagram for the progress!

@lianna_utley

In the next week or so I will show you some inspiration pics on what we are going for with all the finishings in this space!

Master Bathroom Reveal

this post has been a long time coming – so I am so sorry for my delay. If you remember I left off diving into my master bathroom during the one room challenge (spring) right after we moved in. We knew we were going to do the bathroom right away, but honestly I was too ambitious thinking it would take only 6 weeks. Lets be real. We do 90% of the work here at the #littleyellowhouserefresh ourself so no project ever only takes 6 weeks (i’m exaggerating some stuff we can get done in that time…). Anyway so needless to say the bathroom took us 6 months to get done, and at that point I wanted to wait until we officially wallpapered to showoff the final outcome. Well we wallpapered a while ago, so since I am a bad blogger I am just now posting, but we love our new space and I am excited to finally share it with you.

so our bathroom was a MESS, and it was started day 1. Literally Chris and my dad didn’t even try to unpack any boxes to make sure we could cook dinner or wear clothes, they instead thought it would be a fantastic idea to gut the bathroom. at least they got it started.

Like I said, we did all of the work ourself, with the assistance of my trusty dad (retired plumber, lucky us) and cousin (electrical). But Chris and I did all the tile work, mudding, wallpapering ect.

And here is the after. First of all – it was a jack n jill bathroom aka it was a walk through. 2 doors, one to the master bedroom and one to the front hallway. It made the bathroom really a lot smaller than it was, because most of the area was wasted with doors and walk way. This enabled us to make a vanity about 3x the original size. I mean the old teeny vanity didn’t allow me to even have a spot for a curling iron. WTF. So that was a HUGE win.

next HUGE win was opening up the wall that the shower had. Before the bathroom didn’t have a half wall. It went all the way up. It felt like a CAVE. I love the half wall. It’s a small bathroom but the opening up the wall helps it feel much bigger than it really is.

Next. Lets talk about this vanity. Are you in love or in LOVE. I am in DOUBLE LOVE. It’s so fun. It’s exactly what I wanted. It is a custom made piece by some amish friends of my dad. They are the BOMB.

The other thing I love that we changed totally was the doorway to the bathroom. The previous door swung into the bathroom – again waste of space. So we changed it out with 2 small double doors that swing into the bedroom. much better.

I topped the doors with small little circle trim. I thought that was an adorable little touch.

Overall I am super happy with it. I love the way the master bedroom transitions, and the whole space flows together. This, with the bedroom, was the first space that really started to feel like home here. I love it and it is a delight to get ready every morning.

Let me know what you think of the new space!

Since this bathroom, we have also finished our second bathroom so I hope to share that soon!

ORC: Sunroom wk 4

Hey friends! can you believe that it’s already week 4 of the One Room Challenge? For those of you that aren’t farmilar, the One Room Challenge is a super fun blogger event sponsored by Linda of Calling it Home. Participants have 6 weeks to totally transform a room.

I have participated in the past. Master Bedroom (which we didn’t finish), and the Guest Bedroom.

So, since last week we have been working on some of the furniture and decor.

Just as a reminder, this is what the room we are working with looks like.

Here is where we were after Easter weekend. Chandelier painted and hung (although not working yet), everything painted white. We also have a rug in there, but I think I need a different one…I’m not liking it. and I found a cute little half circle table to hold all my husbands plants.

Now, in the last week, We have been working on the dinning table.

We are going to do the Oak Cerusing Method I did on the coffee table. So first thing we had to strip the table down. Which is always a process we are probably about half done.

I followed the tutorial in the link above except this time I used a different stripper that was much better. The fumes were much more controlled and it worked better….

So we have a bit more work to do on that, and then next we have to re-stain it and then do the liming wax!

This isn’t the best picture, but check out this abstract pelican!!! i love him, and I love him even more because my husband Chris painted it for me! We have 2 matching birds that we need to frame to put over the console!!

This week, I am waiting for fabric to be delivered so I can upholster the cornices, sew the cushions, get a new rug, wait for the lemon tree to come to plant it, do the electrical work, frame the pictures, accessorize the console!

phew. Wish me luck!

Be sure to follow along with all the other participants here!

ORC Sunroom Wk 3

Hi Friends! So the last week, we didn’t get as much done as I would hope. We hosted family for Easter. But, we have gotten a lot of the painting done. The painting is taking a long time! The room has a lot of amazing windows, but that means a lot of trim to get painted. We also have a bit of trim fixing to do in one of the windows.

Otherwise I have been ripped apart the cornices….

and finalizing the fabric for both the cornices, and the cushions.


 I’m kinda stumped on the fabric. The original one I liked was spoon flower (not shown) but I would need so many yards, it is getting a big expensive. So I found some other options at Jo Annes, but before I commit want to run to another local fabric store this weekend. But I seriously need to finalize because I need to reupholster the cornices and I need to make all the cushions….this weekend I also need to start stripping the table! I still have a lot to do, so wish me luck!

Don’t forget to check out all the other participants here!

ORC: Sunroom Wk 2

Hey Friends! So excited for the second week of the One Room Challenge!

So I mentioned in the first post, but I have a LOT of DIY’s to accomplish during the next month and a half. But first, heres the mood board.

So a number of these inspiration pieces are craigslist finds. Lets start at the beginging.

Remember the cornices? I am going to have to take those apart and re-upholster them. Haven’t fully picked the fabric yet, but I have something like the fabric in the board on my mind. So I need to pick fabric quick so I have time to upholster them!

Chandelier: So I bought this gold chandelier at a local consignment shop. As you can see in the picture, we taped it all up, and we are going to spray it lime green.

I also found these cool chairs over a year ago. 6 for $100 – not bad! I wasn’t sure at the time what I would do with them, I didn’t have a plan yet for the sunroom. So they have been sitting in the basement since then. I am going to sew cushions for them and finally use them!

Table: I also bought a round oak table and I am going to oak cerused the table similar to what I did here.

I also bought the buffet that is pictured above, also found on craigslist. I was thinking of painting it, but when it was rescued it was so pretty that I have to leave it!

So this space is pretty loaded with craigslist finds and a LOT of projects. Wish me luck as I try to finish them all! Be sure to link up with the other participants here!

Faking Spring: Amaryllis Bulbs

I love forcing bulbs in the spring. It’s a perfect way to add some life after the holidays. In the past I have forced Paper White Bulbs, but wanted to try something different this year. I am loving the Amaryllis Bulbs. They are so big and fun, and so far they are lasting just as long as Paper Whites, which is usually a couple weeks. It takes a couple weeks to bloom and then the blossoms last a couple weeks.

TNPLH: Amaryllis Bulb 2

TNPLH: Amaryllis Bulb 3

TNPLH: Amaryllis Bulb 1